
Create Stunning Christmas Trees Vector Graphics
A friendly guide to creating beautiful Christmas trees vector graphics. Learn AI prompts, customization tips, and how to use your festive designs.
November 22, 2025•12 min read
Learn how to reduce file size of photos easily while preserving quality. Click now for expert tips on optimizing your images effectively!
Instastock Team
October 6, 2025 • 13 min read
Shrinking your photo file sizes is pretty straightforward once you get the hang of it. It’s a simple dance between three key steps: picking the right format (like JPEG or WebP), resizing the image dimensions to fit the space it'll actually occupy, and finally, compressing the file with some clever software or an online tool. Nailing this process means your website stays fast without looking fuzzy.
Before we jump into the "how-to," let's quickly touch on the "why." We've all been there: you click on a website, and it just hangs, slowly painting the screen. More often than not, huge, unoptimised photos are the culprit. It's a surefire way to frustrate visitors and can even hurt your search engine rankings.
Imagine you’ve just snapped a brilliant photo with your high-end camera, and the file is a whopping 5MB. That's fantastic for a giant print, but for your website? It’s a performance disaster. Every single visitor has to download that entire file, which eats up their data and, more importantly, their time. For someone browsing on a patchy mobile connection, it’s a deal-breaker.
The fallout from large image files is more than just a bit of a wait. A sluggish site can have a real, measurable impact on your audience and your goals.
Getting your image sizes down brings some serious perks:
The goal is always the same: deliver a great-looking image in the smallest possible file size. Striking that balance is the secret to a professional, high-performing website.
Getting a grip on a couple of key terms makes this whole optimisation thing much less intimidating. For example, image compression is the secret sauce for keeping websites loading quickly, both in the UK and around the world.
A massive photograph that starts at 7000 x 6000 pixels can easily be resized to 700 x 600 pixels for the web. This single change dramatically slashes its file size without any noticeable drop in quality for on-screen viewing. The magic happens by re-encoding the image data to take up less space, letting it travel across the internet much faster. If you want to dive deeper, you can learn more about what's next for image compression over at Shrink.media.
And if you're on the hunt for visuals, why not start with images that are already good to go? We've got a great collection of free images for presentations that are optimised for digital use from the start.
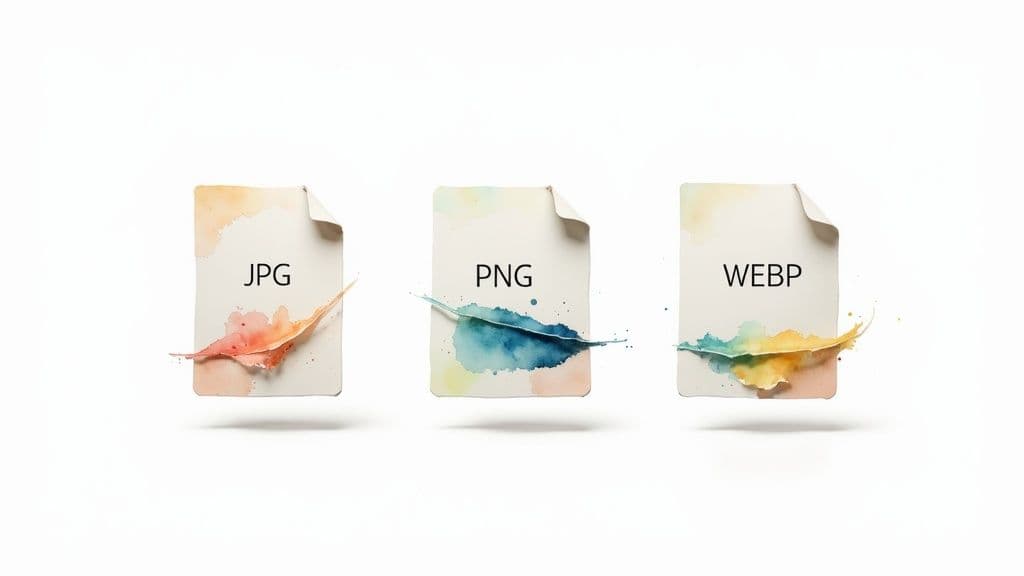
Before you even touch a compression tool or think about resizing, the first decision you make can have the biggest impact on your image's file size. I'm talking about the file format.
Not all formats are created equal, and picking the right one for the job is the first—and most crucial—step in mastering how to reduce the file size of your photos. Think of it like this: you wouldn't use a sledgehammer to hang a picture frame. Using a PNG for a detailed photograph is often just as inefficient, leading to files that are way bigger than they need to be.
For almost any photograph you can think of—a product shot, a team headshot, or that perfect hero image for a blog post—JPEG (or JPG) is your best friend. It was literally designed to handle the millions of colours and subtle gradients you find in real-world photos.
JPEGs use a clever trick called "lossy" compression. This means the format intelligently gets rid of tiny bits of data that the human eye is highly unlikely to notice. The result? A massive reduction in file size with very little perceptible loss in quality. It’s the undisputed champion for web photography for a reason.
The only real downside is that this compression method isn't great for images with sharp lines, text, or solid blocks of colour. You might notice some fuzzy artefacts around the edges in those cases.
If JPEG is for photos, then PNG is the hero for graphics. This format is perfect for things like logos, icons, illustrations, and any image that needs a transparent background. Ever wanted to place your company logo over a coloured section of your website? You need a PNG for that.
PNGs use "lossless" compression, which means they shrink the file size without throwing away any image data. This gives you a perfectly crisp image with sharp, clean lines—exactly what you want for a logo. The trade-off, however, is that PNG files are often significantly larger than JPEGs, especially when you're dealing with complex images like photos.
My rule of thumb: If it's a photo with lots of colours and gradients, go with JPEG. If it's a graphic, logo, or something that needs a transparent background, choose PNG. Following this simple advice will solve about 90% of your file format dilemmas.
A much newer format called WebP, developed by Google, pretty much offers the best of both worlds. It supports both lossy and lossless compression and often produces files that are 25-34% smaller than an equivalent JPEG or PNG, with no visible drop in quality. It also handles transparency and even animations.
Given that it’s supported by all modern browsers now, WebP is a fantastic choice for boosting your website’s performance. In fact, many image optimisation tools and plugins can automatically convert your JPEGs and PNGs into WebP for you, so you get all the benefits without the extra work.
Here’s a quick table I put together to help you decide on the fly.
| Format | Best For | Compression Type | Key Feature |
|---|---|---|---|
| JPEG | Photographs, complex images with gradients | Lossy | Great balance of quality and small file size |
| PNG | Logos, icons, graphics with sharp lines | Lossless | Supports transparency with perfect clarity |
| WebP | All-purpose replacement for JPEG & PNG | Lossy & Lossless | Superior compression and modern features |
So, when you're deciding, just look at your image. For a vibrant, detailed photo, start with a JPEG. For a sharp logo that needs a transparent background, PNG is the only way to go. And if you want the best all-around performance for the web, converting everything to WebP is a smart, forward-thinking move.
Here’s a classic mistake I see all the time: someone takes a gorgeous, high-resolution photo and uploads it straight to their website. That 6000-pixel wide image might look stunning, but it's a behemoth of a file that will drag your page speed down into the mud.
Before you even think about compression tools, the single most effective thing you can do is get the image dimensions right. An image's dimensions—its width and height in pixels—are directly linked to its file size. More pixels equals more data for your visitors to download. It's like trying to stuff a king-size duvet into a pillowcase; you need to use the right size for the space you have.
The golden rule is to match your image dimensions to the largest size it will ever be displayed on your website. Simple as that.
For instance, if your blog's main content area is 800 pixels wide, uploading a 3000-pixel wide image is completely pointless. The user’s browser has to download that massive original file first, only to shrink it down to fit the 800-pixel space. All that extra data is just wasted bandwidth.
So, how do you figure out the right size? One of my favourite tricks is to use the browser's "Inspect" tool. Just find the spot on your site where the image will go, right-click, and choose "Inspect." As you hover over the different bits of code, your browser will highlight the sections on the page and show you their exact dimensions. Resize your image to that width, and you’re off to a great start.
Here are a few common-sense guidelines I stick to:
Let's clear something up that trips a lot of people up: DPI, or dots per inch. You’ll see this setting in tools like Photoshop, but for web images, it means absolutely nothing.
DPI is a setting for printing. It has zero impact on how an image is displayed on a screen.
What actually matters for digital displays are the pixel dimensions (e.g., 1200 x 800 pixels). An image at 72 DPI and another at 300 DPI will look completely identical on a monitor if they both have the same pixel dimensions. So, please, don't waste a second worrying about DPI for your website. Just focus on getting the pixel width and height spot-on.
Resizing your image to its final display dimensions is the single most powerful step you can take. It slashes file size from the very start, making the final compression much more effective.
Getting this right is a fundamental skill, especially for professionals. The UK's professional photography sector, a growing industry valued at around £1.9 billion, lives and breathes this stuff. For photographers showcasing portfolios online, balancing beautiful, high-resolution work with fast loading times is the key to creating a great user experience that wins clients. You can read more about these market trends for professional photography in the UK on West London Studio's website.
By getting the size right from the beginning, you make every other optimisation step that much easier and more effective.
This screenshot from Squoosh shows you exactly what we’re talking about. The original image is on the left, and the optimised version is on the right. You can see the huge drop in file size at the bottom, all with hardly any noticeable change in quality.
Alright, you've chosen the perfect format and nailed the dimensions. You're on the home straight! The last hurdle is running your photo through a compression tool. This is where the real magic happens, shaving off those extra kilobytes to get your file as lean as possible without it looking blocky or blurred.
You’ll find a fantastic range of tools out there, from powerful desktop software for the pros to incredibly simple online tools that get the job done in seconds. Before you dive in, it helps to understand the two main ways they work:
For anyone who wants to get under the bonnet and fine-tune every aspect of their image optimisation, nothing beats professional desktop software. The undisputed champion here is Adobe Photoshop.
Its "Save for Web (Legacy)" feature is an absolute powerhouse. It gives you a side-by-side preview, letting you tweak the quality settings and see the impact on file size and appearance in real time. You can play around with different formats (JPEG, PNG, GIF) and adjust the compression level on a slider until you hit that perfect balance. This is my go-to when I'm working on a client project where quality is completely non-negotiable.
Don't have Photoshop? No problem. If you just need a quick and easy solution, a bunch of brilliant online tools can get the job done with a few clicks. These are a lifesaver for bloggers, small business owners, or anyone who wants to shrink photo file sizes without a steep learning curve.
One of my long-time favourites is TinyPNG. Don't let the name fool you—it works its magic on JPEGs, too. You just drag and drop your images, and its smart compression algorithm gets to work, shrinking file sizes while keeping as much quality as possible.
Another incredible tool that gives you a bit more control is Squoosh. Developed by Google, this browser-based tool is both powerful and super intuitive. It offers a live preview with a slider so you can compare the original and compressed images side-by-side. You can also play with advanced options like resizing and tweaking colour palettes, making it a fantastic all-in-one choice.
Knowing your way around compression tools is a crucial skill in the modern photography industry, particularly in the UK, where image retouching and enhancement services are really taking off.
The global photography services market is set to explode from $55.6 billion in 2023 to $81.83 billion by 2032. That’s a massive jump, and it shows just how much demand there is for high-quality, professionally polished images. This growth underlines why efficient image optimisation has become so essential for meeting the needs of digital platforms.
Ultimately, the best tool is the one that fits your workflow. If you want to do a deep dive into different methods and tools, this expert guide is a fantastic resource to help you reduce image size without losing quality. Whether you choose the granular control of Photoshop or the quick convenience of an online tool, consistent compression is the final, vital step towards a faster website.
Let’s be honest, manually resizing and compressing every single image you upload is a soul-crushing task. If you run an image-heavy blog or online shop, it's a massive time drain. This is where a little bit of automation completely changes the game, freeing you up to focus on what you're good at—creating amazing content.
For most people on WordPress, the simplest and most effective way to do this is with a dedicated plugin. Tools like Smush or ShortPixel are popular for a reason: they just work. You set them up once, and they silently optimise every new image you upload in the background. No more fussing with settings every time you add a photo.
Getting started is usually dead simple. Once you install a plugin, you’ll find a settings page where you can tell it how you want your images handled. You can choose your compression level (lossy is usually best for speed) and even set rules for automatic resizing.
The real magic, though, is the bulk optimiser feature. This tool goes back through your entire media library and optimises every single photo you've uploaded in the past. It’s a brilliant way to bring your whole site up to speed with just a few clicks.
The true win with automation isn't just saving time on new uploads. It's the power to retroactively fix years of unoptimised images, giving your site an instant performance kick.
Setting up your own workflow is a great first step. If you're looking to connect multiple apps and services for even more sophisticated setups, exploring the best AI workflow automation tools can give you some fantastic ideas.
Another brilliant "set it and forget it" method is to lean on your Content Delivery Network (CDN). Modern CDNs like Cloudflare or the adaptive image service from ShortPixel are much more than just delivery networks; they can handle all your image optimisation on the fly.
Here’s a quick look at what they can do for you:
This approach takes the entire workload off your server and guarantees every visitor gets the fastest, most optimised version of your images.
And while you're sorting out your optimisation, don't forget you can always find great source material in our extensive stock image library. Combining high-quality images with an automated workflow is the secret to a professional and efficient website.
Getting to grips with image optimisation often brings up a few common questions. I've been asked these countless times, so let's run through them with some clear, practical answers to get you on the right track.
Not if you do it right! This is probably the biggest fear people have, but the goal is to find that perfect sweet spot between a tiny file and a beautiful-looking image. It’s a balancing act, not a demolition job.
When you use the right format (like JPEG for photos), resize your image to the dimensions you actually need first, and then apply a sensible level of compression, you can shrink the file size dramatically. Honestly, in most cases, the change in visual quality is so subtle that the average person will never spot it.
This is a classic "it depends" question, but I can give you some solid targets to aim for. The photo's job on your website really dictates its ideal size.
The real key is to make each photo as small as possible without a noticeable drop in quality. Always preview it on a live page before you sign off on it.
Understanding this is fundamental to getting your image strategy right. They sound similar, but they work in completely different ways.
Lossless compression is the gentle approach. It reduces file size by removing non-essential data from the file (like camera info) without touching a single pixel of the actual image. This means there's absolutely zero quality loss, but the file size reduction is usually pretty modest.
Lossy compression is much more aggressive. It cleverly removes pixel data that the human eye is unlikely to notice, which makes the file significantly smaller. For almost all web photos, a small amount of lossy compression is the way to go.
Yes, a thousand times yes! This is probably the single most important step in the entire process.
Uploading a massive 5,000-pixel wide photo when it will only ever be shown at 800 pixels wide is a huge waste of bandwidth. The browser has to download the enormous file and then shrink it on the fly, which really slows down your page.
Always, always resize your images to the maximum dimensions they'll be displayed at on your site before you do anything else. While you're at it, it’s also vital to know your rights; our guide on how to avoid copyright infringement is a great resource for navigating that tricky area.
Ready to create stunning, unique visuals without worrying about file sizes or licensing fees? With Instastock, you can generate any image you imagine with AI, edit it with simple text commands, and own it completely. Create your first five images for free and see how easy it is to produce on-brand content in seconds.
A friendly guide to creating beautiful Christmas trees vector graphics. Learn AI prompts, customization tips, and how to use your festive designs.
Learn how to create a stunning AI drawing of a flower. Our friendly guide covers everything from prompts and styles to editing your digital floral art.
Discover how to create stunning AI photo frames templates. This guide offers actionable tips for designers and marketers to elevate their visual content.