Create a Perfect Brushed Metal Texture From Scratch
Learn how to create a realistic brushed metal texture. Our guide covers Photoshop, Blender, and AI methods for designers and 3D artists.
November 13, 2025•14 min read
Learn how to generate images with AI using practical, expert-led techniques. Move beyond basic prompts to create stunning, professional-quality visuals.
Instastock Team
September 28, 2025 • 12 min read
Learning a practical guide on how to generate images with AI is pretty simple on the surface. You type a description into an AI tool, and it spits out an image based on your words. The real magic, though, is in the details—learning to write prompts that get you exactly the visual you have in your head.
AI image generation has moved well past the novelty phase. It’s now a genuinely useful tool that’s changing how creative work gets done. For marketers, artists, and small business owners, it’s a way to create high-quality, specific visuals without the usual time and expense of stock photography or hiring a designer.
The concept is beautifully straightforward. You take an idea from your mind, describe it with words, and an AI model brings it to life visually. Think of it as having a super-fast illustrator on call, ready to turn your thoughts into assets in seconds. This isn't just a fun trick; it's proving to be incredibly powerful for all sorts of real-world tasks.
The potential uses are growing every day. A blogger can now create a perfectly fitting, unique feature image for every single post. A marketing team can whip up dozens of ad variations for A/B testing in a single afternoon. It really opens things up.
Here are a few ways people are already putting it to work:
This shift towards AI-powered visuals is backed by some serious investment. In the UK, a whopping 67% of tech businesses are putting more money into generative AI, recognising its creative power. That said, it's still early days. 68% of companies have moved less than 30% of their AI experiments into full-scale use, suggesting a cautious but optimistic approach.
This image here is a great example of the kind of detailed, atmospheric scenes you can create with just a simple text prompt.

It shows how well the AI can handle complex things like lighting, texture, and overall mood to produce something truly compelling. If you're curious about how this stacks up against traditional methods, we’ve got an article that explains https://instastock.studio/blog/why-ai-stock-photos-are-the-perfect-adobe-stock-alternative.
Your first step into AI art is picking the right tool for the job. There are tons of options out there, but for this guide, we'll walk through a platform like Instastock. It's built to be pretty intuitive, so you can jump in without a steep learning curve. The setup is usually straightforward—sign up, and you’re ready to go.
When you first log in, you'll land on a dashboard. Take a second to get your bearings. You should see a main text box—that’s where you’ll type your prompts. You'll also likely find a gallery of your previous work and menus for different settings. Just getting a feel for this layout is half the battle won. Don't feel pressured to understand every single button right away; just locate the essentials.
To get good results, you really only need to focus on three things when you're starting out:
Treat your first few attempts as pure experimentation. Seriously, just play around. Type in simple prompts and see how the AI translates them into images. If you're curious and want to go deeper into how this all works under the hood, this A Guide to Artificial Intelligence Drawing is a fantastic read.
A bit of advice from experience: set up a simple workflow from the very beginning. Create different folders or projects for specific campaigns or client work. It seems like a small thing, but this little bit of organisation will save you a massive headache later when you’re hunting for that one perfect image.
The main goal here is to get comfortable enough that you can start creating without thinking too much about the tool itself. When you know where everything is, you can stop fighting with the interface and focus all your energy on bringing your ideas to life. A tidy digital workspace makes the whole process smoother and, honestly, a lot more fun.
This is where the magic really starts to happen. You’re set up with the tool, you get the general idea, and now it's time to pull that vision out of your head and onto the screen. The secret to getting brilliant AI-generated images isn't about learning some complex new language; it's about learning to be an excellent communicator. Think of it less like writing code and more like briefing a super-talented, but very literal, artist.
If you just type "a dog in a park," you'll get something, but it will probably be generic and a bit dull. The AI has to fill in all the gaps, and its creative choices might be miles away from what you imagined. Your goal is to give it as much information as possible, leaving very little to chance.
To get from a fuzzy concept to a crisp, detailed image, you need to think in layers. I've found that focusing on five key components gives you the most control and consistently gets me closer to the image I actually want.
Here’s a breakdown of what to include:
Subject: Always start with your main focus. Who or what is the star of the show? Don't just say "a cat." Try something like, "a fluffy ginger cat with striking green eyes."
Medium: What is this thing meant to be? A photograph? A painting? Specify "photorealistic photograph," "delicate watercolour painting," or "sharp 3D render" to set the foundational look.
Style: This is all about the vibe. Words like "cinematic," "vintage," "cyberpunk," or "minimalist" can completely transform the mood of the final image.
Composition: Where is the virtual camera? Are we up close or far away? Use photography terms like "close-up portrait," "sweeping wide-angle landscape," or "dramatic low-angle shot" to frame the scene.
Lighting: What time of day is it? Is the light soft and gentle or harsh and dramatic? Add phrases like "golden hour sunlight," "moody neon city lights," or "soft, diffused light on an overcast day."
When you start weaving these elements together, you're essentially creating a detailed recipe for the AI to follow. It’s a much more reliable way to work. If you want to see what this looks like in practice, checking out some of the top AI-generated stock animal photos offers some fantastic real-world examples.
The process of building up a prompt is really an exercise in adding detail, moving from a simple subject to a fully realised scene.
As you can see, each new layer of information refines the instruction and steers the AI towards a much more specific, and usually much better, result.
To really see this in action, the table below shows how adding these layers of detail transforms a simple idea into a stunning AI-generated image.
| Component | Purpose | Simple Example | Detailed Example |
|---|---|---|---|
| Subject | Identifies the main focus of the image. | A car | A vintage red sports car |
| Medium | Defines the visual format (photo, painting, etc.). | Photo | A professional, high-resolution photograph |
| Action | Describes what the subject is doing. | Driving | Speeding down a winding coastal road |
| Setting | Establishes the environment or background. | On a road | At sunset, with the ocean on one side |
| Style | Sets the overall artistic mood and aesthetic. | Realistic | Cinematic, dramatic lighting, lens flare, vibrant colours |
By combining these elements, you’re not just asking for a picture; you’re directing a whole photoshoot.
Let’s apply this framework to a completely different idea, starting with something incredibly basic: "a cat on a chair."
Original Vague Idea: A cat on a chair.
Now, let's inject those layers of detail we just talked about.
New Detailed Prompt: A cinematic, photorealistic shot of a fluffy ginger cat napping on a dark green velvet wingback chair, warm afternoon sunlight streaming through a nearby window, creating long shadows, soft focus background.
The difference is night and day, isn't it? We haven't just described a basic scene; we’ve set a specific mood, defined the time of day, and even called out the exact textures and colours we want to see. This level of detail is precisely what separates a throwaway AI image from a compelling, custom visual that perfectly matches your brief. This structured thinking is your repeatable formula for getting great results every time.
Once you've got the hang of writing a basic, solid prompt, it’s time to really start pulling the creative levers. This is where you learn how to tell the AI not just what to make, but what to leave out, which parts of your idea are most important, and even how to frame the final shot. It’s the difference between telling a taxi driver "take me downtown" and giving them a precise, turn-by-turn route to your exact destination.
Getting to grips with these methods is crucial for fine-tuning your images until they’re spot-on. When you know how to nudge the AI in the right direction, you can fix common headaches like wonky hands or strange compositions without having to scrap the whole idea and start over.
One of the most effective tools you'll ever use is the negative prompt. It’s a simple, direct command that tells the AI what you don't want to see in the image. This is your go-to for cleaning up common AI quirks or stripping unwanted clutter from a scene.
For instance, you might be trying to generate a peaceful, untouched forest, but the AI keeps adding random hikers or modern buildings in the background. A negative prompt lets you forbid those elements explicitly.
Here are a few ways I use them all the time:
bad anatomy, extra limbs, poorly drawn hands, mutatedblurry, grainy, low resolution, watermark, textcars, buildings, people, crowdsBy clearly defining what to exclude, you're essentially drawing a boundary for the AI, which almost always results in a cleaner, more focused image. It's a small tweak that makes a massive difference.
Honestly, mastering negative prompts is a total game-changer. It stops you from wrestling with the AI and lets you guide it with precision, saving you countless re-rolls and a whole lot of frustration.
This kind of detailed control is becoming non-negotiable for creative professionals. While the general public is still warming up to these tools, the creative industries are way ahead of the curve. In fact, around 29% of the UK population now actively uses generative AI, and a big chunk of that figure is designers and marketers who depend on these techniques to get their work done faster and better. You can dig into more of the data on UK AI adoption over at sqmagazine.co.uk.
Ever find the AI is stubbornly ignoring a key part of your prompt? That’s where weighting comes in. By assigning a numerical value to a word or phrase, you’re telling the AI, "Hey, pay extra attention to this bit."
The exact way you write it can differ slightly from one platform to another, but the idea is the same. For example, some tools use parentheses and a number to boost a term's influence.
A photo of a red car (a standard, unweighted prompt)A photo of a (red:1.3) car (this tells the AI the colour is 30% more important)This is brilliant for situations where the AI isn't quite capturing the vibe you want. Let's say you ask for a "knight in shining armour" but the results look dull and flat. By weighting the word "shining," you force the AI to prioritise that brilliant, reflective quality. You can also do the opposite and de-emphasise things with a value below one, like (crowd:0.5), to push the crowd further into the background.
If you really want to elevate your images, you need to start thinking like a photographer or a cinematographer. You can take control of the virtual "camera" by dropping specific photographic terms right into your prompt. This lets you dictate everything from the composition and perspective to the type of lens used.
Here are a few powerful camera commands to get you started:
Macro shot, Close-up, Medium shot, Full body shot, Wide-angle shotShallow depth of field, Bokeh, Lens flare, Rack focusLow-angle shot, High-angle view, Bird's-eye view, Dutch angleWhen you start blending these advanced skills—negative prompts, weighting, and camera controls—you stop being a passive user simply describing a scene. You become a proper art director, guiding the AI with intent to create precisely the image you have in your head.
That first image the AI spits out is always a thrill, but it's rarely the final product. The real magic happens in the refinement process. This is where you roll up your sleeves and turn a good-enough concept into something truly professional. I like to think of it less as a one-shot deal and more like stepping into a digital darkroom, with a whole suite of tools ready to fix, tweak, and perfect your initial creation.
Luckily, platforms like Instastock have these editing tools built right in, so you don't have to jump over to separate software. This is your chance to fix those weird little quirks AI can sometimes introduce or even add completely new elements to the scene. The goal is to iterate, to build on what works, until the image in front of you perfectly matches the one in your head.
Ever generated a fantastic image, only to notice a hand has six fingers or an object just looks… off? That’s what inpainting is for. It’s a lifesaver. This feature lets you mask off a specific part of the image and give the AI a new, targeted prompt just for that little section.
Let's say you've got a great shot of someone holding a coffee cup, but the handle is a melted-looking mess. No problem. You just paint over the cup and tell the AI to "regenerate a white ceramic coffee cup with a normal handle." It will rework only that highlighted area, leaving everything else perfectly intact.
It’s incredibly powerful for things like:
Sometimes an image just feels a bit too tight, a bit too cropped. You find yourself wishing you could see what’s just outside the frame. That's where outpainting comes in. It lets you extend the borders of your image, and the AI intelligently fills in the new space based on what’s already there.
You could take a tight portrait and expand it into a wider shot, revealing the person's shoulders and more of the room they're in. This is perfect for changing an image's aspect ratio, like turning a square post into a wide website banner, or just giving your composition a bit more breathing room. It’s like asking a virtual photographer to take a step back and capture more of the scene.
Being able to iterate directly on an image is a massive workflow improvement. Instead of starting from scratch with a brand new prompt every time, you can build upon a generation you already like. It saves a ton of time and leads to a much more consistent final piece.
What if you love the composition of an image but the style is all wrong? This is where image-to-image generation really shines. You can feed an existing image back to the AI along with a text prompt to completely change its aesthetic.
For example, you could take a photorealistic cityscape and give it a prompt like, "in the style of a vintage watercolour painting." The AI uses your original photo as a blueprint for the composition but completely re-renders it with the new artistic flair. This is a brilliant way to create a whole set of visuals for a campaign, adapting one core image to fit different brand guidelines or themes without losing the original structure.
As you dive into creating images with AI, you'll inevitably run into a few common questions. It’s all part of the process, but figuring out these early challenges can make a huge difference in the quality of your work and how quickly you get the hang of it.
So, let's get into some of the most frequent hurdles I see people face.
The biggest mistake? Being too vague. A prompt like "a nice forest" is a recipe for a generic, uninspired image because you're forcing the AI to guess what "nice" means to you. You'll get far better results by feeding it specific, descriptive details.
Another classic pitfall is sending mixed signals. Asking for something like a "bright, dark room" just confuses the model. It's also a good idea to avoid packing too many complicated ideas into a single prompt. Sticking to one clear, central subject nearly always produces a stronger, more focused image.
One of the biggest challenges, especially if you're creating visuals for a brand or a specific project, is getting a consistent look and feel. The secret here is to develop what I call a "style signature."
This is essentially a unique string of keywords describing your desired aesthetic that you add to every prompt for that particular project. It’s like a recipe for your visual style.
For instance, you might consistently use:
flat illustration style, pastel colours, clean lines, minimalistcinematic photo, dramatic lighting, moody atmosphere, 85mm lensSome of the more advanced platforms also let you use a "seed" number from an image you really like. Reusing this seed tells the AI to start from a similar random point, which dramatically increases the odds of getting a similar character or composition in your next generation.
Developing a repeatable style signature is the key to professional-level work. It's what turns a random batch of pictures into a cohesive set of on-brand visual assets. This one habit will make your entire workflow more predictable and effective.
The legal side of AI art is still evolving, but a few key principles are becoming pretty clear. In most cases, your right to use an image comes down to the terms of service of the platform you're using. Reputable AI image generators usually grant you full commercial rights to anything you create.
That means you can use your images for your business, in marketing materials, or for personal projects without needing to worry about extra licensing fees. The big responsibility on your end, however, is to avoid stepping on existing intellectual property. That means you shouldn't be prompting for trademarked characters or trying to create exact likenesses of real people without their permission.
Always take a moment to check the specific terms of the tool you're using. If you want to dig deeper into this, our guide explains how to avoid copyright infringement when using AI. Staying informed is the best way to create with confidence.
Ready to put all this into practice? Instastock provides everything you need to generate unique, high-quality images that you own completely. Start creating your first five images for free and see where your imagination takes you. https://instastock.studio
Learn how to create a realistic brushed metal texture. Our guide covers Photoshop, Blender, and AI methods for designers and 3D artists.
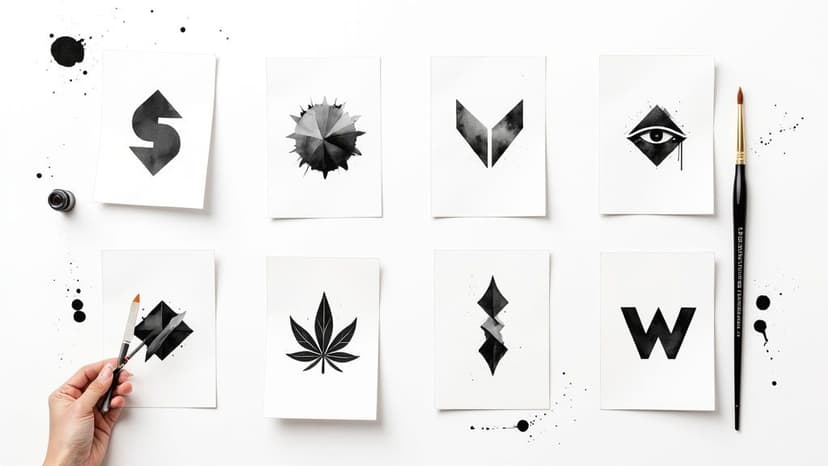
Discover 8 striking black and white logos styles that prove bold contrast can elevate any brand. Find ideas, tips, and timeless design inspiration.
Discover the best fonts for posters and how to pick standout type for print. Top 7 picks and where to find them.