
How to Create Mockups That Impress Your Clients
Learn how to create mockups that win projects. This guide covers planning, tool selection, and presentation tips for designers.
November 2, 2025•13 min read
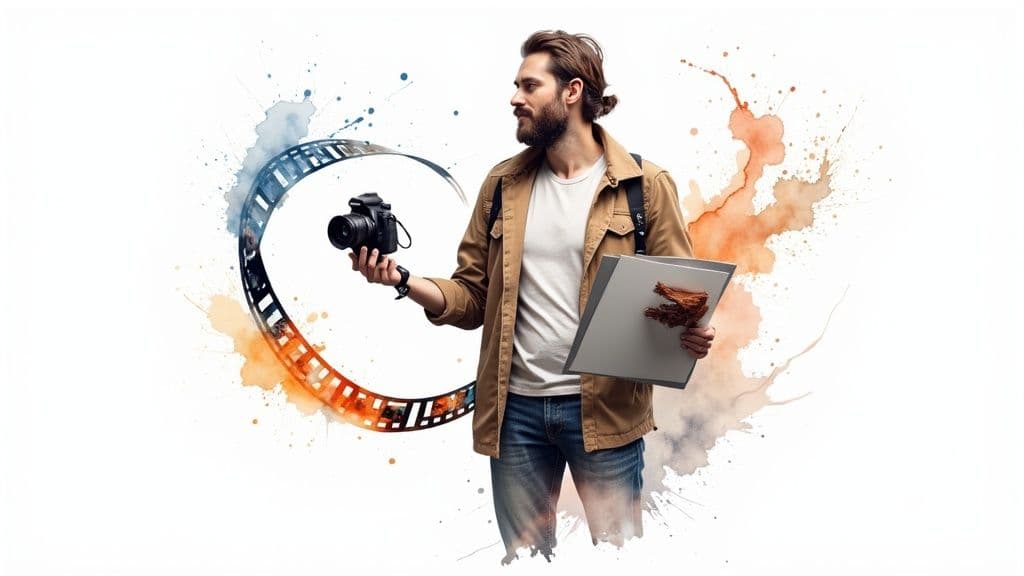
Want to learn how to make videos that connect with an audience? This guide breaks down planning, shooting, editing, and using AI tools to get started.
Instastock Team
October 27, 2025 • 16 min read
Learning how to make videos that genuinely connect with people really boils down to getting your head around five key stages: planning, shooting, editing, publishing, and now, weaving in AI to make it all faster. I've put this guide together to walk you through everything, step-by-step, without any of the confusing tech-speak.
Ever scrolled through your feed and wondered how your favourite creators make it look so easy? The secret isn't fancy, expensive gear. It’s all about understanding the process from the spark of an idea to the final published video. Honestly, it's a skill anyone can pick up with a bit of guidance.
Think of this guide as your roadmap. We’ll kick things off with the most important part—the planning stage. This is where you turn a vague idea into a solid, shootable plan. After that, we’ll get into the hands-on stuff: shooting your footage and then editing it all together into something you’ll be proud of.
Before we dive in, let's get a bird's-eye view of the whole journey. Each stage builds on the one before it, so getting a handle on the flow now will save you a lot of headaches later.
Key Takeaway: A great video is rarely a happy accident. It’s the result of a deliberate, structured process. Nail each stage, and you'll end up with something polished, professional, and impactful.
Here’s a quick overview of what to expect:
Let’s get into it. Whether you’re looking to build a brand, grow a channel, or just share something you’re passionate about, we'll cover what you need to know.
 Let's be honest, the best videos never just happen. They’re the result of careful thought and solid groundwork laid long before anyone shouts "action!". This initial planning stage is where you get to turn a spark of an idea into a proper, workable plan that'll guide you through the entire creative process.
It’s tempting to just grab a camera and start shooting, I get it. But jumping the gun is the fastest route to a video that feels disconnected, with a message that gets lost along the way. A little time spent here pays off massively later.
Before you even think about a script, you need to nail down two crucial things: who is this video for, and what’s the one thing you absolutely need them to take away from it? Getting this right from the start is non-negotiable.
Think about it. If you're creating a video for a local bakery, are you trying to catch the eye of busy parents looking for a quick breakfast, or are you hoping to connect with foodies who appreciate the craft of artisan sourdough? The tone, the visuals, and the entire vibe would be worlds apart.
Once you know who you're talking to, you need to sharpen your message. If your viewer only remembers one single thing, what should it be? This becomes your North Star for every decision that follows.
Okay, now you’ve got your audience and your message sorted. It’s time to start sketching out how this video will actually look and sound. This doesn’t have to be some intimidating, Hollywood-level production. A simple script and a rough storyboard are your best friends here.
The script is simply what will be said, whether by you, an actor, or a voiceover. The storyboard, on the other hand, is what will be seen. It’s basically a comic-strip version of your video, planning out each shot. You don’t need to be an artist – stick figures are perfectly fine! This is all about spotting any awkward pacing or confusing moments before you’ve wasted a second of filming.
A storyboard is to a video what a recipe is to a cake. It makes sure you’ve got all the right ingredients (your shots) ready to go before you start baking (filming).
This is also the perfect moment to think about visual storytelling. The scenes you choose are just as important as the words. We’ve actually got a great guide on what is visual storytelling that can help you think more deeply about how to show, not just tell, your story.
Finally, it’s time to get down to the brass tacks – the logistics. This is the stuff that ensures your filming day is smooth, productive, and maybe even fun, rather than a frantic mess. It's all about sorting out locations, props, people, and schedules.
Go through your storyboard scene by scene and make a list of everything you'll need. Does that interview scene require a totally quiet room? Do you need to have your product perfectly polished and ready for its close-up? A detailed checklist is your secret weapon against last-minute panic.
The UK's production industry is a brilliant example of just how vital this preparation is. The UK film and high-end TV sector saw a production spend of £5.7 billion between mid-2024 and mid-2025. That staggering figure is built on a foundation of meticulous planning for every single project.
Here’s a quick pre-production checklist to get you started:
Putting in this effort upfront frees you up to focus on being creative when the camera is actually rolling.

Okay, you've got your plan nailed down. Now for the fun bit – actually bringing your ideas to life on camera. Let go of the idea that you need a Hollywood-sized budget or a lorry full of gear. Seriously, the camera in your pocket or that DSLR you've been meaning to dust off is more than capable of producing incredible results.
The real secret to professional-looking video isn't about expensive kit; it's about understanding the fundamentals. We're going to dive into the three things that make the biggest impact: lighting, sound, and composition. Get these right, and you'll instantly elevate your video from a simple recording to a polished, engaging piece of content.
Lighting is, without a doubt, the most powerful tool you have for controlling the mood and quality of your shots. Bad lighting can make even the priciest camera spit out grainy, flat, and unappealing footage. The brilliant news? Great lighting doesn't have to be complicated or cost a fortune.
Your best and cheapest lighting source is the sun. Just filming near a large window can give you that soft, natural light that looks fantastic on camera. Try to position your subject so they’re facing the window, letting their face be evenly lit. If the sun's a bit too harsh, you can easily diffuse it with a thin white sheet or a net curtain to soften any hard shadows.
When natural light isn't an option, a few simple household lamps can work wonders. Avoid the harsh glare from a main overhead light. Instead, get strategic with two or three smaller lamps.
Pro Tip: Consistency is everything. If you're shooting an interview over a few hours, remember that natural light shifts. Using a simple lamp setup gives you more control and ensures all your footage has a consistent, professional look and feel.
You’ve probably heard it before: "Viewers will forgive bad video, but they won’t forgive bad audio." It's 100% true. If your audience can’t clearly hear what's being said, they’ll click away in seconds, no matter how beautiful your shots are. Crisp, clear audio isn't just a nice-to-have; it's essential.
The built-in microphone on your camera or phone is designed to pick up sound from all directions. That means it also grabs every bit of distracting background noise – traffic, the hum of an air conditioner, or echoes in a large room. The easiest fix? Get the microphone closer to your subject.
Even a cheap and cheerful lavalier microphone (one of those small clip-on mics) plugged into your phone can make a night-and-day difference. For interviews, it guarantees the speaker's voice is always front and centre. If you're filming on the move, a small shotgun mic mounted on your camera will help you focus on the sound right in front of you.
Composition is simply the art of arranging everything in your frame to create a visually pleasing shot. It’s how you guide your viewer’s eye and tell your story without needing words. Instead of just pointing and shooting, taking a moment to frame your shot thoughtfully adds a real layer of professionalism.
A brilliant place to start is the Rule of Thirds. Picture your screen divided into a 3x3 grid. The idea is to place your key subject or points of interest along these lines or where they cross, rather than smack-bang in the middle. It’s a simple trick that creates a more balanced and dynamic shot that just feels more natural to look at.
The UK's creative industry, which supported around 300,000 jobs in 2023, is built on these foundational skills of visual storytelling. While the sector has faced its share of challenges with shifting streaming models and industrial action, its core strength has always been in creating compelling content. To put it in perspective, the UK’s visual effects (VFX) industry alone generated £1.7 billion in 2019, proving just how much value is placed on high-quality visuals. If you're curious, you can learn more about the UK creative sector's economic outlook.
By focusing on these three pillars—lighting, sound, and composition—you’ll be well on your way to capturing footage that not only looks professional but also gets your message across powerfully.

Right, this is where the magic really happens. You've done the hard work of planning your story and capturing all the footage, but the edit is where you get to shape that raw material into something truly compelling. It’s a wonderfully creative process, a blend of technical know-how and pure storytelling instinct that turns a folder of random clips into a video that just flows.
Don't be put off by the thought of complicated editing software. Honestly, the basic principles are the same whether you're using a free app on your phone or a beast of a program on a desktop. Your job is to find the best bits of what you filmed and string them together in an order that makes sense and feels right.
Before you even think about making your first cut, spend a few minutes getting organised. It sounds boring, I know, but trust me, this simple step will save you a mountain of headaches later. Just create a main project folder, and inside that, make separate folders for your video clips, audio files (like music or voiceovers), and any graphics you might use.
This clean setup means you’ll never be tearing your hair out trying to find that one perfect shot. As you import your footage, watch it all through and give your best takes descriptive names. Something like "WideShot_Intro_Take2" is infinitely more helpful than "Clip_004.mp4."
At its core, editing is all about deciding where one shot ends and the next begins. The first thing you'll want to do is create a "rough cut." This just means chucking your best takes onto the timeline in the right order. Don't stress about perfect timing just yet; the goal is simply to build the basic skeleton of your story.
Once that foundation is in place, you can start tightening things up. Trim the start and end of each clip to get rid of any fumbles or awkward pauses. This is how you control the pacing of your video. A series of quick, snappy cuts can inject a real sense of energy, while letting a shot linger for a few extra seconds can build tension or create a more thoughtful mood.
Key Insight: Editing isn't just about chopping out the bad bits. It's about combining the good bits in a way that creates a rhythm and an emotional journey, guiding your audience exactly where you want them to go.
With your story taking shape, it's time to add the finishing touches that bring it to life. Sound and colour are your secret weapons for setting the mood and making your video feel polished and professional.
1. Music and Sound Effects: The right soundtrack can completely transform a video. An upbeat track can make a simple tutorial feel exciting, while a subtle, atmospheric piece can add a layer of emotional depth. Don't forget little sound effects—a gentle "whoosh" for a text transition or a satisfying "click" for a button press—can make the whole experience more immersive.
2. Basic Colour Correction: You don't need to be a Hollywood colourist to make your footage look ten times better. Most editing software has simple tools to tweak brightness, contrast, and saturation. Your main goal here is consistency—making sure all your clips match and that the colours look natural.
3. Simple Titles and Text: Adding text can provide crucial context, highlight key points, or introduce a speaker. Keep it clean, easy to read, and in line with your brand's style. Often, a simple "lower-third" graphic with a person's name and title is all you need.
It’s these post-production skills that power the UK’s video production market, an industry that generated around £4.8 billion in 2023. The projected growth in this area shows just how much demand there is for high-quality video. It's a clear sign that learning how to polish your own content is an incredibly valuable skill in a world hungry for video. You can read more about the strength of the UK video production sector on Grandview Research.
The software you choose really boils down to your budget, your experience, and what you're trying to create. The great news is, there are brilliant options at every price point, from free to professional-grade.
Here’s a quick rundown of some popular choices:
| Software Category | Examples | Best For |
|---|---|---|
| Mobile Apps (Free) | CapCut, InShot | Quick edits for social media, easy-to-use templates, and editing on the fly. |
| Desktop (Free) | DaVinci Resolve, Shotcut | Newcomers who want powerful features without the price tag. DaVinci Resolve, in particular, has pro-level colour tools. |
| Desktop (Paid) | Adobe Premiere Pro, Final Cut Pro | Serious creators and professionals who need advanced features and rock-solid performance for complex projects. |
My advice? Start with a free option to get the hang of the basics. Once you understand timelines, cuts, and simple effects, you'll know if you need to step up to a paid program. The skills are completely transferable.

What if you could skip the endless hunt for the right stock footage, or avoid setting up a whole new shoot just for a few seconds of video? This is where artificial intelligence is really starting to change the game. We can now turn a simple text idea into a genuinely engaging video clip in a matter of moments. It sounds like something from a film, but it’s a practical tool available right now.
Let's say you're completely stuck on a concept for a social media ad. Instead of staring at a blank screen, you could just type something like, "an overhead shot of a steaming latte on a rustic wooden table, with gentle morning light." An AI tool like Instastock can take that prompt and generate a video clip for you. It's an incredible time-saver and a brilliant way to kickstart your creativity when you're feeling blocked.
Getting started is surprisingly simple. You just write a descriptive prompt – a sentence or two painting a picture of the scene you have in your head. The AI takes your words, interprets them, and creates a unique video clip based on its vast training data.
The real magic, though, is in the iteration. If the first clip isn't quite what you wanted, you don't have to start over. Just tweak your prompt. For example, you might add, "...with a person's hands slowly stirring the coffee" to bring more action into the scene. This rapid feedback loop means you can produce completely custom visuals at a speed that was impossible before.
I've found this is a game-changer for creating B-roll. Instead of settling for generic clips from stock libraries, you can generate footage that perfectly fits the mood and subject of your main video. It makes everything feel more cohesive.
Okay, enough theory. How does this actually work in the real world? AI video generation isn't just a cool party trick; it solves genuine production headaches for all sorts of creators. If you want to make videos faster, it’s worth looking into how AI can help during post-production. For a more detailed look, this guide on AI Integration in Post Production is a great resource.
Here are a few ways I’ve seen these tools put to immediate use:
The biggest win here is efficiency. When you automate the creation of certain visual assets, you get back precious time. That’s more time to focus on the story, the edit, and actually getting your video out there. Plenty of creators are already taking advantage of this shift, and you can learn more about using AI for content creation to see its wider impact. Think of these tools as a creative assistant, helping you bring your vision to life faster than ever.
Right, you’ve put in the hard work, and now for the best part: getting your video out there for people to see. Publishing is more than just hitting the ‘upload’ button. It’s about strategically setting up your content to find its audience and get the attention it deserves.
First things first, where are you going to post it? Every platform has its own vibe, audience, and preferred format. That slick, fast-paced vertical video that’s perfect for TikTok or Instagram Reels will probably fall flat as a long-form tutorial on YouTube. You really have to think about where your target audience hangs out and what they expect to see there.
Once you’ve settled on a platform, you need to package your video to make people actually want to click on it. There are three things you absolutely have to nail: the title, the description, and the thumbnail. Think of them as a team working together to grab someone’s attention and instantly tell them what your video is all about.
Your title needs to be both clear and catchy. It should tell people what’s inside but also pique their curiosity. A great title often promises to solve a problem or poses a question that people want the answer to.
For instance, instead of a flat title like "My Sourdough Recipe," something like "The Fail-Proof, No-Knead Sourdough Recipe You've Been Searching For" is far more compelling. It's specific and promises a real benefit.
The video’s description is where you can add more context and drop in important keywords. This is crucial because it helps the platform’s algorithm figure out what your video is about, so it can show it to the right people. Give a quick summary of the video and be sure to include any links or resources you promised.
The thumbnail is your video’s billboard. Honestly, it might be the single most important visual you create. A great thumbnail can massively boost your click-through rate, so don't rush it. Use a crisp, high-quality image, add some bold text, and if it makes sense, include a human face.
Don't fall into the "publish and pray" trap. A bit of active promotion can make all the difference. The easiest win is to share the new video across all your other social media channels. You could create a short teaser clip for Instagram Stories, write a dedicated post on Facebook, or even pop it into your next email newsletter.
Another brilliant move is to embed the video directly into a relevant blog post on your website. This not only gives it an instant audience but can also increase how long people stay on your site, which is great for SEO. Getting this part right is a game-changer, and we dive much deeper into this in our guide on how to improve social media engagement.
Diving into video for the first time can feel like you've suddenly got a million questions and no clear answers. It’s easy to get lost in the weeds before you even press record, but honestly, most of those early roadblocks aren't as big as they seem. Let's tackle some of the most common things that trip up new creators.
This is always the first question, isn't it? Do you need to drop a load of cash on a fancy camera, a three-point lighting kit, and a broadcast-quality microphone right out of the gate?
The simple, honest answer is no. Absolutely not. The best camera to start with is the one you have in your pocket. Your smartphone. Modern phones shoot ridiculously good video, and it’s more than enough to get you started.
If you have a small budget, don't spend it on a new camera. Instead, focus on two things that will give you the biggest bang for your buck: sound and stability. A cheap lapel mic that clips onto your shirt will make your audio sound a hundred times better. A basic tripod will get rid of that shaky, amateur-looking footage. Those two small investments make a world of difference.
Another classic hurdle. You want to make your video more engaging with some background music or cutaway shots (what we call B-roll), but where do you get it? You definitely can't just rip your favourite song from Spotify – that's a surefire way to get a copyright strike.
Thankfully, the internet is filled with amazing resources for royalty-free music and stock footage. YouTube's own Audio Library is a great place to start, with a massive catalogue of free tracks you can use without any stress. For visuals, stock libraries offer clips on pretty much any subject you can think of, helping you show what you're talking about without having to film every single second yourself.
My Two Cents: Don't let a lack of professional equipment hold you back. Nail the fundamentals – clear audio, stable shots, and decent lighting (a window works great!) – and lean on free resources to add that extra polish.
Ah, the million-dollar question. The answer is... it depends. It's less about a magic number and more about the platform and your subject matter. The best piece of advice I ever got was to make your video as long as it needs to be, but not a second longer.
Still, some general guidelines can help:
At the end of the day, your message is king. If you can teach something brilliantly in five minutes, don’t pad it out to ten. Respect your viewer's time, and they'll thank you for it by watching your next video.
Ready to create stunning visuals without the hassle of filming? With Instastock, you can generate unique, high-quality video clips and images from a simple text prompt. Start creating for free today at https://instastock.studio.
Learn how to create mockups that win projects. This guide covers planning, tool selection, and presentation tips for designers.
What is omnichannel marketing? Learn how to build a seamless customer experience that drives loyalty and growth for your UK business with this practical guide.
Your complete guide to social media image dimensions. Get the latest sizes and best practices for Instagram, Facebook, X, and LinkedIn to optimize your content.